
Hawaiian Roll Beef Super Bowl Party Sliders Recipe You’ll Love
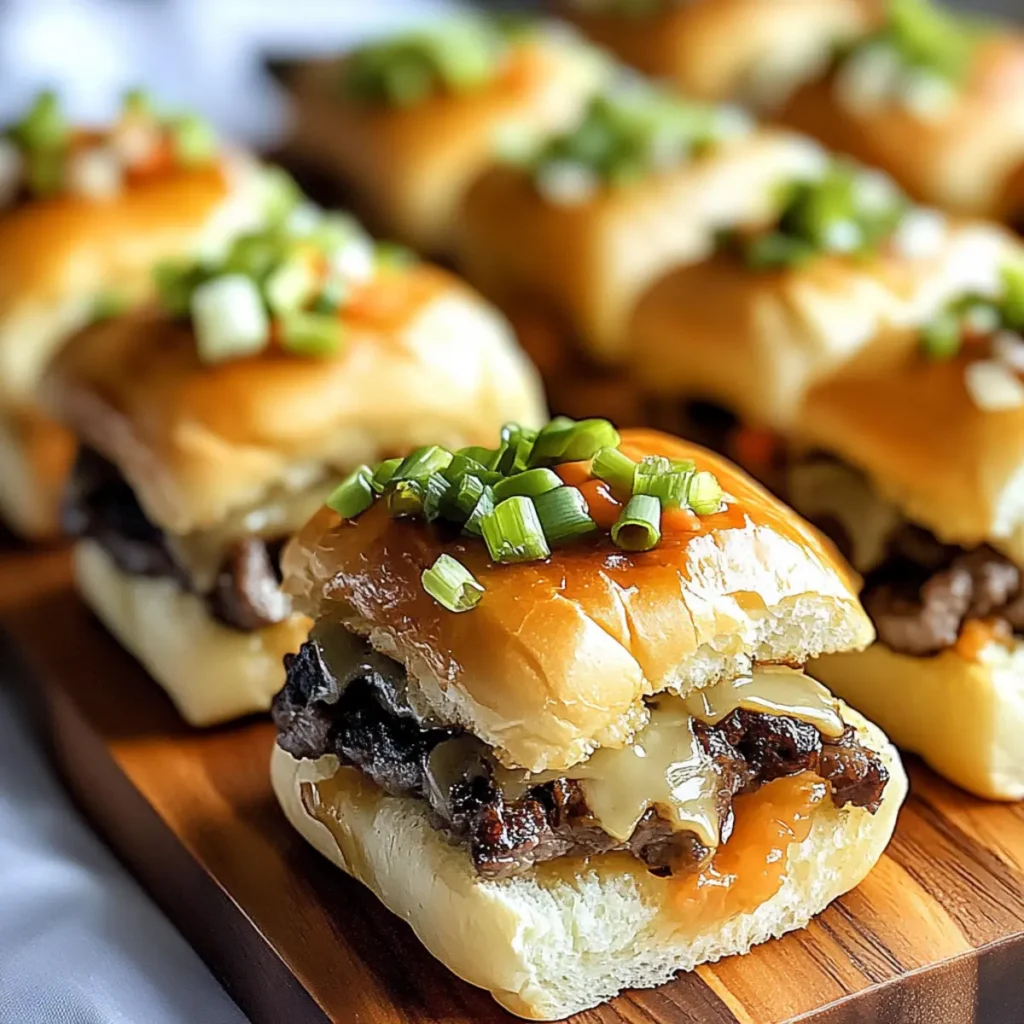
Hawaiian Roll Beef Super Bowl Party Sliders are the perfect combination of soft, sweet bread and hearty, savory beef, creating a flavor explosion that will have your taste buds dancing with joy. Imagine pulling apart warm, gooey sliders that burst with melted cheese and zesty BBQ sauce, all nestled between fluffy Hawaiian rolls—pure bliss on game day, or any day for that matter. These sliders are not just food; they are an experience to savor while surrounded by friends and family, sharing laughter and maybe a little friendly competition if the Super Bowl is on. Picture this: it’s a cool evening, the game is thrilling, and the aroma of these sliders fills the room, pulling everyone together like a warm hug. Your guests will celebrate their culinary fortune as they devour these sliders, asking for seconds, thirds, and maybe even a fourth, because once you start, it’s hard to stop. Ingredients for Hawaiian Roll beef Super Bowl Party Sliders Here’s what you’ll need to make this delicious Hawaiian Roll beef Super Bowl Party Sliders: 12 Hawaiian Sweet Rolls – These small, fluffy rolls are the star of the show, adding a delightful sweetness to each bite while also acting as the perfect vessel for the beef. 1 lb lean ground beef – Opt for lean beef to ensure a juicy finish without excess grease, providing a meaty base full of flavor. 1 cup shredded cheddar cheese – This sharp cheese adds a tangy contrast to the sweetness of the rolls, creating a mouthwatering balance. 1 cup shredded mozzarella cheese – Melty and creamy, mozzarella brings extra gooeyness, making the sliders irresistible. 1 medium onion, diced – Onions provide a savory boost and sweetness when cooked, enhancing the overall flavor profile of the sliders. ½ cup BBQ sauce – Use your favorite BBQ sauce to add a smoky, tangy depth to the beef, sealing in all the delicious flavors. Optional: Sliced pickles for topping – Add a crunchy, tangy contrast on top for those who love a little extra zing with their sliders. How to Make Hawaiian Roll beef Super Bowl Party Sliders Follow these simple steps to prepare this delicious Hawaiian Roll beef Super Bowl Party Sliders: Step 1: Preheat the Oven Start by preheating your oven to 350°F (175°C). Grab a baking dish and grease it lightly with cooking spray or olive oil to prevent sticking. Step 2: Sauté the Beef and Onions In a skillet over medium heat, brown your ground beef along with the diced onions for about 5 to 7 minutes. Make sure to stir occasionally and drain any excess fat to keep it deliciously juicy. Step 3: Incorporate BBQ Sauce Add the BBQ sauce to your beef and onions, stirring it all together. Allow it to simmer for 3 to 5 minutes, letting the flavors meld beautifully. Step 4: Prepare the Rolls Slice the Hawaiian rolls in half horizontally, creating a bottom layer to hold all that deliciousness. Place the bottom halves snugly in your greased baking dish. Step 5: Assemble the Sliders Spoon the beef mixture evenly onto each of the bottom rolls, allowing the savory filling to cascade across every slider. Make it even more decadent by sprinkling both cheddar and mozzarella cheeses on top. Step 6: Bake to Perfection Carefully place the top halves of the rolls back on. Cover the dish with foil and bake for about 15 minutes. Then, remove the foil and let it bake uncovered for an additional 5 minutes until the tops are golden and the cheese is bubbly. Feel free to serve these magnificent sliders with sliced pickles on the side for guests to customize their delectable creations. With every bite, you and your crew will experience the warm flavors melding into the perfect bite-sized treat. Enjoy watching the game while indulging in the delicious joy of Hawaiian Roll beef Super Bowl Party Sliders. Perfecting Hawaiian Roll beef Super Bowl Party Sliders Cooking Process Start by browning the ground beef with onions in a skillet to maximize flavor. While the meat simmers with BBQ sauce, slice your Hawaiian rolls and prepare your baking dish for final assembly. Add Your Touch to Hawaiian Roll beef Super Bowl Party Sliders Feel free to swap the cheeses for your favorites or add some sautéed mushrooms for an earthy twist. You can also kick up the heat with jalapeños or try different sauces like teriyaki for a fun change. Storing & Reheating Hawaiian Roll beef Super Bowl Party Sliders Store leftover sliders in an airtight container in the fridge for up to three days. To reheat, cover the sliders with foil and warm in the oven at 350°F until heated through—approximately 10 minutes. Nothing warms my heart quite like the time I made these Hawaiian Roll beef sliders for a family gathering. After the first bite, my aunt declared them “life-changing,” and honestly, I couldn’t have hoped for a better compliment! FAQs About Hawaiian Roll beef Super Bowl Party Sliders What is Hawaiian Roll beef Super Bowl Party Sliders? Hawaiian Roll beef Super Bowl Party Sliders are delightful mini sandwiches layered with seasoned ground beef, tangy BBQ sauce, and a blend of melted cheeses, all nestled between sweet Hawaiian rolls. These sliders are a popular choice for gatherings, especially during the Super Bowl season, as they are easy to prepare and offer a burst of flavor in every bite. Ideal for sharing, they can transform any occasion into a festive celebration, making them a hit with both kids and adults alike. How do I store leftover Hawaiian Roll beef Super Bowl Party Sliders? To store leftover Hawaiian Roll beef Super Bowl Party Sliders, place them in an airtight container in the refrigerator. They can last for up to three days, allowing you to enjoy them later without losing flavor. For best results, wrap individual sliders in foil or parchment paper before placing them in the container. When you’re ready to eat, simply reheat them in the oven at 350°F
Delicious Cheesy Onion Bake Recipe for Cheesy Goodness
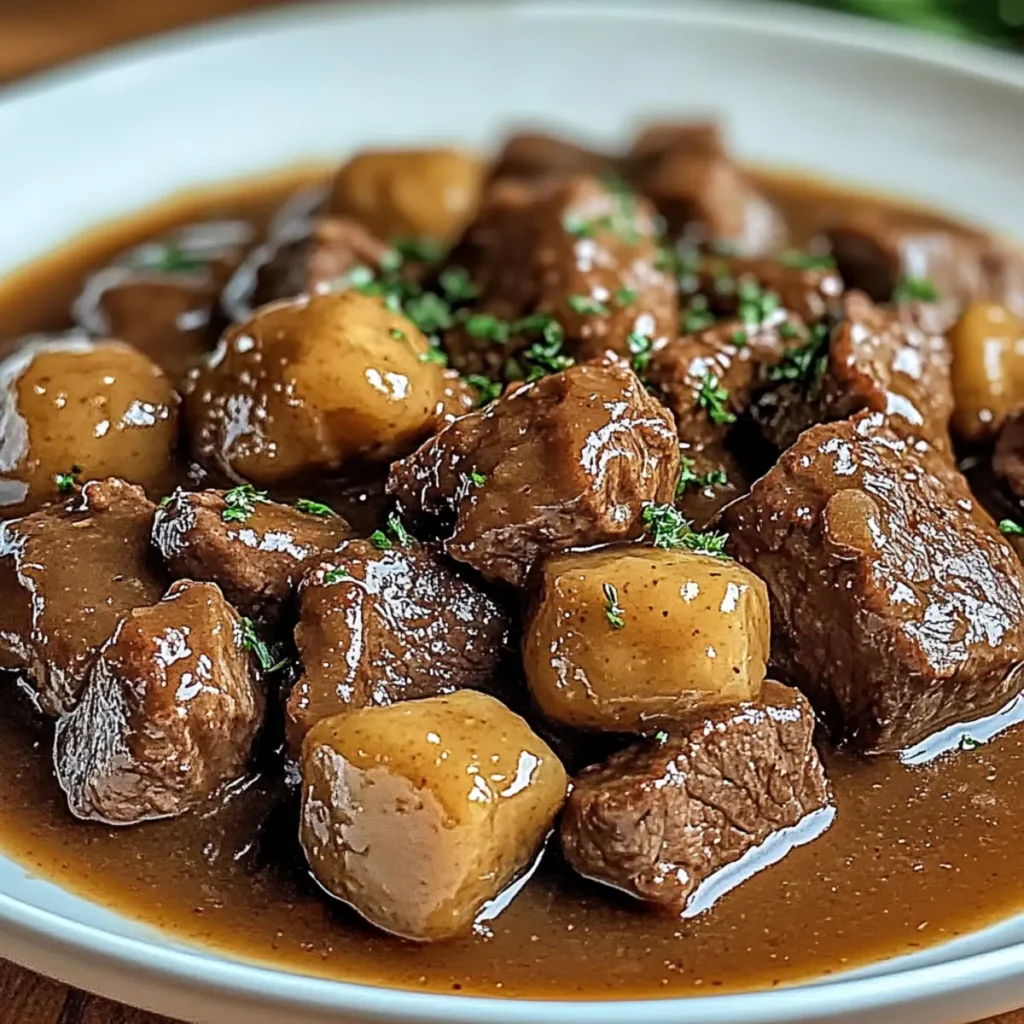
The aroma of a bubbling Cheesy Onion Bake wafts through the air, inviting you to gather around the table and indulge in its cheesy goodness. It’s a dish that promises to deliver a warm, comforting embrace with rich flavors and delightful textures that dance on the palate. This recipe isn’t just about ingredients; it’s a piece of my heart, evoking memories of cozy family gatherings where laughter and delectable bites flow freely. Think of this Cheesy Onion Bake as your go-to dish for chilly evenings, potlucks, or even a weeknight dinner that feels special. You know, the kind of meal that makes everyone feel at home and keeps them coming back for seconds. Get ready for a flavor journey that puts those fast-food cravings to shame! Ingredients for Cheesy Onion Bake Here’s what you’ll need to make this delicious Cheesy Onion Bake: 2 medium Onions – Sweet or yellow onions work best for a delicious flavor that caramelizes beautifully. 2 cups Cheddar Cheese – Use sharp or mild cheddar depending on your taste; it adds a creamy richness and melty texture. 8 oz Cream Cheese – This gives the bake a creamy, dreamy consistency. Make sure it’s softened for easy mixing. 1 cup Sour Cream – Adds a tangy flavor that balances the richness of the cheeses. 1 teaspoon Garlic Powder – Enhances the savory notes and brings depth to the dish. to taste Salt and Pepper – Essential for elevating the flavors and enhancing the overall taste profile. 1 cup Panko Breadcrumbs – These light and crispy breadcrumbs create a delightful topping that contrasts with the creamy base. 1/2 cup Parmesan Cheese – Best for adding that extra layer of umami flavor and a crispy finish. 1/4 cup Fresh Parsley – Chopped fresh parsley adds a pop of color and freshness to the dish right before serving. How to Make Cheesy Onion Bake Follow these simple steps to prepare this delicious Cheesy Onion Bake: Step 1: Preheat the Oven Preheat your oven to 350°F (175°C). It’s essential to have that warmth ready to transform your ingredients into a bubbling masterpiece. Step 2: Sauté the Onions Slice the onions into thin rings or half-moons, whichever you prefer! In a skillet over medium heat, sauté the onions until they become translucent and lightly caramelized, which should take about 5-7 minutes. Their sweet aroma will fill your kitchen, making your mouth water. Step 3: Mix the Cheesy Goodness In a large mixing bowl, combine the sautéed onions, Cheddar cheese, cream cheese, sour cream, and garlic powder. Be sure to mix everything thoroughly until it’s a creamy and cohesive mixture. Don’t forget to season it with salt and pepper to your liking! Step 4: Transfer to Baking Dish Spread the cheesy onion mixture evenly into a baking dish, making sure it’s all nicely laid out. Prepping your dish well will ensure that each scoop is every bit as delicious as the last. Step 5: Top it Off Now for the crunchy topping! Sprinkle the Panko breadcrumbs and Parmesan cheese evenly over the top of the cheesy layer. This will create that irresistible golden-brown crust we all love. Step 6: Bake to Perfection Place the dish in your preheated oven and bake for about 30 minutes, or until the top is beautifully golden brown and crispy. The cheesy aroma will start to envelop your kitchen, drawing everyone in like moths to a flame. Transfer to plates and garnish with freshly chopped parsley before serving. This gorgeous Cheesy Onion Bake isn’t just a feast for the belly but a treat for the eyes too! Enjoy with your family and friends—it’s guaranteed to be the star of the table! Perfecting Cheesy Onion Bake Cooking Process Begin by slicing the onions and sautéing them until soft. While that’s happening, mix together the cheeses and sour cream. Assemble everything in a baking dish, top with breadcrumbs, and bake for perfectly golden results. Add Your Touch to Cheesy Onion Bake Feel free to swap out Cheddar for Gruyere or add in cooked bacon bits for an extra savory kick. Fresh herbs like thyme or rosemary can also elevate the flavor profile, making it your own. Storing & Reheating Cheesy Onion Bake Store leftovers in an airtight container in the fridge for up to three days. To reheat, bake in a preheated oven at 350°F until warmed through, ensuring the topping stays crispy. When I first made this Cheesy Onion Bake for a family gathering, the compliments flowed like wine at a celebration. My aunt even asked if I had secretly taken culinary classes—it was that good! FAQs About Cheesy Onion Bake What is Cheesy Onion Bake? Cheesy Onion Bake is a delightful dish that combines the savory flavors of onions with rich cheeses, resulting in a creamy, satisfying appetizer or side. This dish typically features sautéed onions mixed with cheddar and cream cheese, creating a comforting and gooey texture. Topped with crispy breadcrumbs, it’s perfect for gatherings or cozy family dinners. The combination of ingredients makes it a versatile option that can complement various main courses, and it’s sure to impress your guests. How do I customize my Cheesy Onion Bake? There are countless ways to personalize your Cheesy Onion Bake. For instance, you can substitute the cheddar cheese for Gruyere or even a mix of your favorite cheeses to create a unique flavor profile. Adding bacon bits provides a savory crunch, while fresh herbs like thyme or rosemary can give it a bright, aromatic touch. Don’t hesitate to experiment; make it your own and tailor it to your taste! Can I make Cheesy Onion Bake ahead of time? Absolutely! Cheesy Onion Bake is a fantastic make-ahead dish. You can prepare the mixture earlier in the day or even the night before. Just combine the ingredients, store them in the baking dish, and cover tightly. When ready to serve, bake it in the oven, adjusting the time if it’s coming straight from the fridge. This allows flavors to
Crispy Baked Parmesan Zucchini Chicken Cutlets
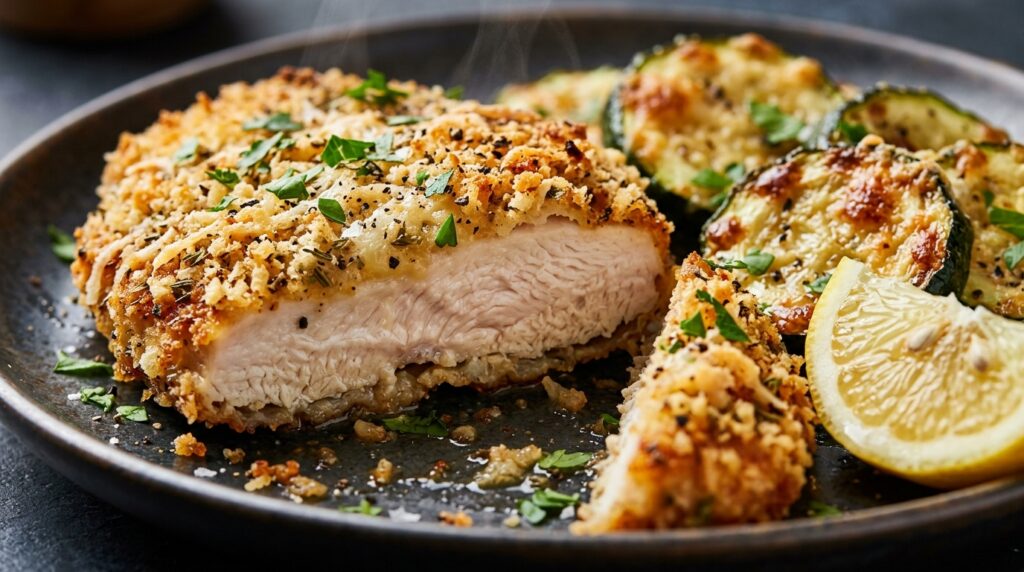
When a busy weeknight demands crispy comfort without the greasy mess of deep-frying, these crispy baked parmesan zucchini chicken cutlets deliver pure dinner perfection in just 30 minutes. Thinly sliced, tender chicken breasts coated in an ultra-crispy Japanese panko and aged parmesan herb crust roast on a single sheet pan alongside tender, roasted garlic zucchini rounds with blistered golden edges. The culinary secret to achieving restaurant-quality shatteringly crisp baked chicken without oil submersion lies in combining airy Japanese panko with finely grated aged Parmesan cheese. As the high-heat oven circulates around the cutlets, the cheese melts into the breadcrumbs, creating a lacquered savory barrier that locks in the chicken’s natural moisture while crisping the exterior to a satisfying crunch. Why You’ll Love This Recipe 30-Minute Sheet Pan Ease: Both the high-protein chicken cutlets and the zucchini vegetable side roast together on one baking tray, minimizing post-dinner cleanup. Shatteringly Crisp Without Deep Frying: High-heat convection baking at 425°F crisps the panko-parmesan crust with just a light mist of heart-healthy olive oil. 100% Halal Wholesome: Prepared with certified halal chicken breast, nutrient-packed fresh zucchini, and clean pantry seasonings with zero pork or alcohol derivatives. Low-Carb & High-Protein Balance: Packing 44 grams of lean protein per serving with fresh zucchini delivering essential vitamins and dietary fiber. Key Ingredients & Smart Swaps Lean halal chicken breast cutlets, fresh zucchini, and artisan panko breadcrumbs prepped on a quartz workstation. Thin Chicken Breast Cutlets: Slicing chicken breasts horizontally into thin cutlets ensures rapid, even cooking so the meat stays remarkably juicy while the crust turns deeply golden. Japanese Panko Breadcrumbs: Panko flakes are larger and lighter than standard breadcrumbs, resisting sogginess and creating the crunchiest exterior. Gluten-free panko works seamlessly. Aged Parmesan Cheese: Blended directly into the breading and sprinkled over the zucchini coins. Freshly grated Parmigiano-Reggiano melts into a savory, nutty crust. Fresh Green Zucchini: Sliced into 1/3-inch rounds so they caramelize and turn tender-crisp in the exact same 20-minute oven window. Yellow summer squash makes a colorful alternative. Italian Herb Seasoning & Garlic: Dried oregano, basil, thyme, and garlic powder infuse both the chicken crust and the vegetable side with vibrant Mediterranean warmth. Fresh Lemon Wedges: A generous squeeze of fresh lemon juice over the hot crispy cutlets cuts through the savory cheese crust with bright citrus acidity. Step-by-Step Cooking Walkthrough 1. Set Up the Dredging Station: In one bowl, whisk eggs with salt and pepper. In a second shallow bowl, thoroughly combine panko breadcrumbs, grated parmesan, garlic powder, Italian seasoning, and smoked paprika. 2. Bread the Chicken Cutlets: Pat chicken cutlets dry with paper towels. Dip each piece in egg, let excess drip off, then press firmly into the parmesan panko mixture to ensure complete, even adhesion. Arranging breaded cutlets and parmesan-topped zucchini coins in a single layer guarantees maximum crispiness. 3. Arrange on Sheet Pan: Place breaded cutlets on one half of a parchment-lined baking sheet and mist lightly with olive oil. On the other half, scatter zucchini coins tossed in olive oil, garlic, and extra parmesan. 4. High-Heat Bake & Quick Broil: Bake at 425°F (220°C) for 18 to 20 minutes until chicken reaches 165°F (74°C). Broil on high for the final 2 minutes for extra golden blistered crunch, then garnish with fresh parsley. 3 Chef Secrets for Perfect Results 1. Press the Breadcrumbs Firmly: When dredging the cutlets, use the palms of your hands to firmly press the panko-parmesan mixture into the meat. This locks in the crust so it doesn’t flake off during roasting. 2. Light Mist of Olive Oil: Spraying or lightly drizzling olive oil over the panko before baking is the secret to achieving that deep golden frying-pan color and crispness without submerged oil. 3. Slice Zucchini to Uniform 1/3-Inch Coins: Cutting the zucchini too thin causes it to turn watery, while too thick leaves it raw. A uniform 1/3-inch thickness cooks in exact lockstep with the thin cutlets. What to Serve With Parmesan Zucchini Chicken Garnished with chopped parsley and cracked pepper alongside a tall glass of sparkling citrus water. Warm Garlic Herb Rice: Steamed jasmine rice tossed with roasted garlic butter and fresh parsley complements the crunchy chicken. Simple Arugula & Cherry Tomato Salad: Peppery baby arugula and sweet cherry tomatoes tossed in lemon vinaigrette add crisp, refreshing contrast. Marinara Dipping Sauce: A small bowl of warm, slow-simmered San Marzano tomato marinara sauce makes a delicious dip for the crispy parmesan cutlets. Chilled Sparkling Citrus Cooler: Ice-cold sparkling water infused with fresh lemon and mint leaves provides a refreshing palate cleanser. Storage, Freezing & Reheating Instructions Refrigeration: Store leftover chicken cutlets and roasted zucchini in an airtight container lined with a paper towel (to absorb moisture) for up to 4 days. Oven or Air Fryer Reheating: Reheat cutlets in an oven or air fryer at 375°F (190°C) for 5 to 6 minutes to completely restore the shatteringly crisp crust. Avoid the microwave, which will turn breading soft. Freezing Guidelines: Freeze uncooked breaded cutlets on a baking sheet until solid, then transfer to a freezer bag for up to 3 months. Bake directly from frozen at 400°F for 25 minutes. Frequently Asked Questions Can I make these chicken cutlets in an air fryer?Yes! Air fry the breaded cutlets at 390°F (200°C) for 10 to 12 minutes, flipping halfway through, until crispy and golden with an internal temperature of 165°F. How do I prevent the zucchini from getting soggy?Roast zucchini on high heat (425°F) in a single layer with space between slices. If slices are crowded, steam causes sogginess instead of crisp caramelization. Can I use chicken thighs instead of breasts?Yes, boneless skinless chicken thighs pounded flat work wonderfully and remain exceptionally juicy under the crispy parmesan crust. Pin This Recipe for Later Love quick, healthy crispy chicken dinners? Save this pin to your Pinterest weeknight dinner board so you always have this 30-minute family favorite ready to make! Pin this 30-minute Crispy Baked Parmesan Zucchini Chicken Cutlets to your Pinterest boards!
Juicy Garlic Herb Butter Roasted Turkey Breast
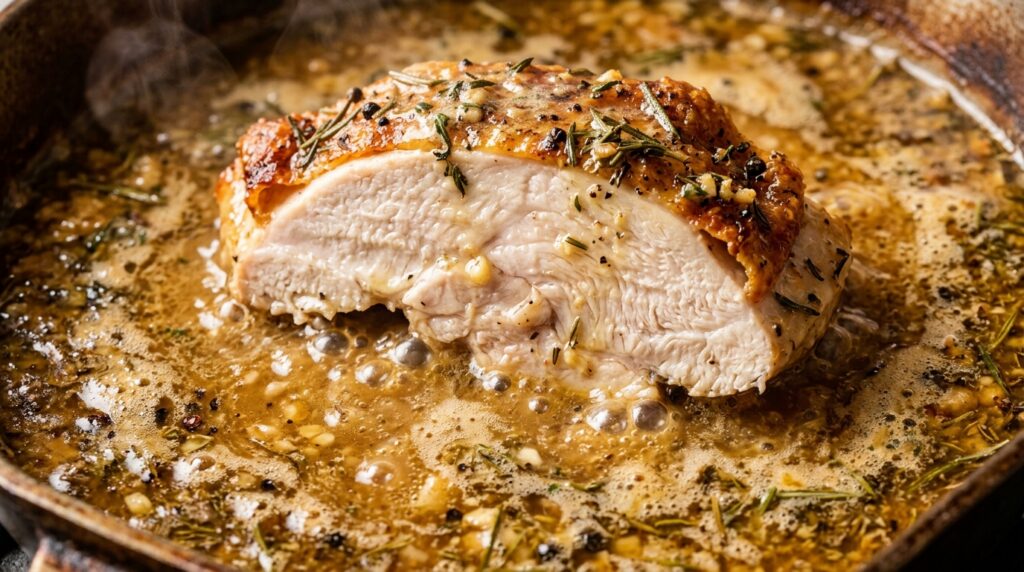
When it comes to hosting a memorable holiday feast without the stress of roasting a massive whole bird, this juicy garlic herb butter roasted turkey breast stands as the ultimate culinary centerpiece. Coated inside and out with a savory rosemary, sage, and roasted garlic compound butter, this bone-in halal turkey breast roasts to glistening mahogany perfection with ultra-crisp skin and remarkably tender, succulent white meat in just over an hour. The culinary secret to banishing dry turkey forever lies in rubbing seasoned compound butter directly beneath the skin before roasting. As the oven heat melts the herb butter, the garlic and fresh poultry aromatics baste the meat continuously from the inside out, sealing in precious natural juices while the exterior skin crisps to a crackling golden lacquer. Paired with rich pan drippings simmered with halal bone broth, every bite delivers pure Thanksgiving bliss. Why You’ll Love This Recipe Guaranteed Juicy & Tender: Roasting a bone-in breast cut preserves optimal moisture and prevents the dreaded overcooked dryness of traditional whole turkeys. Streamlined 75-Minute Roasting: Cuts holiday oven cooking time from 4+ hours down to just 75 minutes, freeing up valuable oven real estate for casseroles and pies. 100% Halal Wholesome: Prepared with certified halal turkey, nutrient-dense bone broth, fresh autumn herbs, and zero alcohol basting or pork additives. Built-In Rich Herb Pan Gravy: Roasted over a bed of sweet onions, garlic heads, and bone broth, yielding intensely flavorful pan drippings for instant table gravy. Key Ingredients & Smart Swaps Fresh bone-in halal turkey breast, softened butter, and poultry herbs prepped for holiday roasting. Bone-In Skin-On Halal Turkey Breast: The bone acts as a thermal conductor ensuring even cooking while insulating the meat against drying out. Boneless turkey roast can be used (reduce roast time by 15 minutes). Unsalted European-Style Butter: High-fat butter produces the crispiest skin and richest flavor. Ghee or extra virgin olive oil make delicious dairy-free alternatives. Fresh Poultry Herb Trio: Finely minced fresh rosemary, sage, and thyme embody the quintessential aroma and flavor of traditional holiday celebrations. Fresh Garlic Cloves: Minced garlic in the butter rub, plus whole roasted garlic heads in the pan bed, infuse the meat and drippings with sweet roasted richness. Low-Sodium Chicken or Turkey Bone Broth: Kept in the bottom of the roasting pan to keep meat humid and provide a rich base for pan gravy without burning. Lemon Juice & Smoked Paprika: A splash of fresh lemon brightens the rich herb butter, while sweet smoked paprika gives the skin an appetizing deep amber roast color. Step-by-Step Cooking Walkthrough 1. Whip the Compound Herb Butter: In a mixing bowl, blend softened butter with minced garlic, chopped rosemary, sage, thyme, smoked paprika, garlic powder, salt, black pepper, and lemon juice until fluffy and uniform. 2. Prep and Butter Under the Skin: Pat the turkey breast completely dry with paper towels. Carefully loosen the skin from the breast meat with your fingers and spread two-thirds of the compound butter directly onto the meat. Rub the remaining butter over the outside skin. Basting the turkey with bubbling herb pan juices every 25 minutes ensures deep golden crispness. 3. Roast and Baste: Arrange onion wedges and garlic heads in your roasting pan with broth. Place turkey skin-side up on top. Roast at 375°F (190°C) for 65 to 75 minutes, basting with pan juices every 25 minutes until internal temperature hits 162°F (72°C). 4. Rest and Carve: Transfer turkey to a cutting board, tent loosely with foil, and rest for 15 minutes. Carve against the grain into thick succulent slices and drizzle with pan drippings before serving. 3 Chef Secrets for Perfect Results 1. Dry the Skin Thoroughly: Any surface moisture causes the skin to steam rather than crisp. Use dry paper towels and allow the breast to air-dry in the refrigerator for 30 minutes before seasoning. 2. Trust Your Meat Thermometer, Not the Clock: Turkey breast is done the exact second the internal temp reaches 162°F at the thickest part. Resting will gently carry it to the USDA-safe 165°F without evaporating moisture. 3. Never Skip the 15-Minute Rest: Slicing into hot turkey immediately forces hot juices to flood onto the cutting board. Resting allows meat fibers to relax and reabsorb all the buttery moisture. What to Serve With Roasted Turkey Breast Served on a festive holiday platter with fresh herbs alongside fluffy mashed potatoes and autumn sides. Ultra-Creamy Garlic Mashed Potatoes: Whipped Yukon golds with brown butter and roasted garlic are the ultimate pairing for catching herb pan gravy. From-Scratch Green Bean Casserole: Crisp tender green beans tossed in creamy mushroom sauce topped with crispy fried onions. Honey Brown Butter Roasted Carrots: Sweet caramelized rainbow carrots add vibrant autumn color and sweet balance to the holiday table. Warm Sourdough Herb Stuffing: Golden toasted artisan sourdough baked with celery, leeks, and savory turkey drippings. Storage, Freezing & Reheating Instructions Refrigeration: Store carved turkey slices and pan drippings in an airtight glass container in the refrigerator for up to 4 days. Gentle Reheating: Place slices in a baking dish with a splash of broth or leftover pan gravy, cover tightly with foil, and warm at 300°F (150°C) for 12 to 15 minutes so the meat stays moist. Freezing Guidelines: Freeze carved turkey slices submerged in pan broth in a freezer-safe container for up to 3 months. Thaw overnight in the refrigerator before gently warming. Frequently Asked Questions How many people does a 6 lb turkey breast feed?A 5 to 6 lb bone-in turkey breast generously serves 6 to 8 adults with plenty of coveted holiday leftovers for sandwiches the next day. Can I use a boneless turkey breast?Yes! Boneless turkey breast roasts cook faster. Check temperature at the 50-minute mark and remove from the oven when the thermometer reaches 162°F. Can I prepare the herb butter ahead of time?Absolutely. Whip the compound herb butter up to 4 days in advance and keep wrapped in plastic wrap in the refrigerator. Bring to room temperature before rubbing under the turkey skin.
Cozy Creamy White Chicken Lasagna Soup
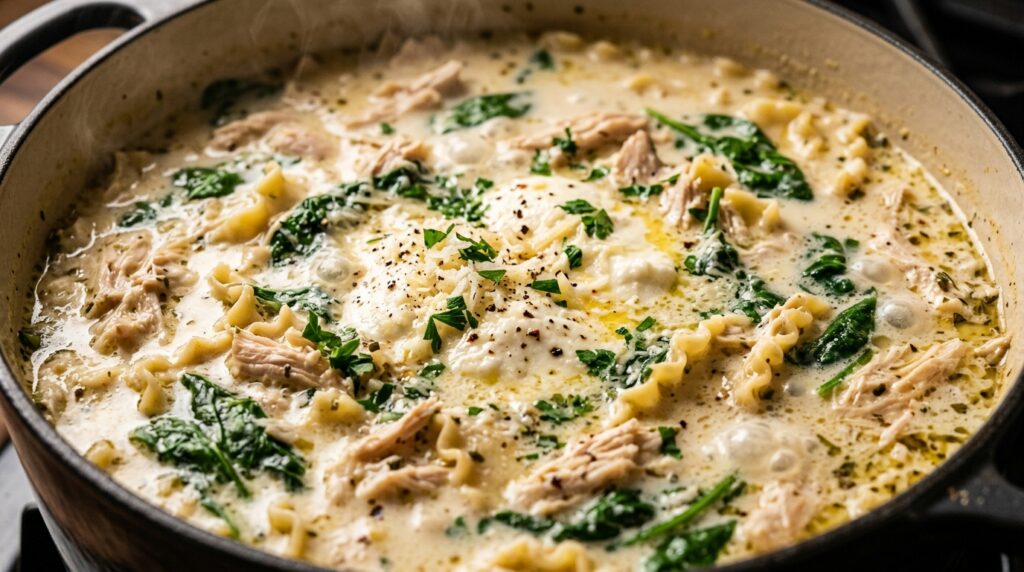
When brisk autumn evenings call for the ultimate bowl of comfort, this cozy creamy white chicken lasagna soup transforms traditional oven-baked lasagna into a luxurious 30-minute stovetop sensation. Tender ripples of broken lasagna noodles, juicy shredded halal chicken breast, and tender baby spinach swim in a velvety garlic-parmesan cream broth, finished with a luscious dollop of Italian herb-seasoned ricotta that melts into every comforting spoonful. Cooking broken lasagna noodles directly in rich chicken bone broth allows the natural pasta starches to thicken the broth naturally, creating a silky mouthfeel that coats the back of your spoon. Paired with aromatic sautéed onions, fresh garlic, and melted aged Parmesan, this soup captures all the layered decadence of classic white lasagna with a fraction of the layering effort and baking time. Why You’ll Love This Recipe 30-Minute One-Pot Comfort: Skips the tedious assembly, layering, and 60-minute bake time of traditional lasagna, delivering cozy satisfaction on busy weeknights. Melting Ricotta Herb Swirl: Cold seasoned ricotta dolloped onto steaming soup creates a dreamy contrast of temperatures and rich cheesy textures. 100% Halal Wholesome: Made with lean halal chicken breast, collagen-rich chicken bone broth, and pure dairy with zero pork products or alcohol deglazing. Naturally Thick & Luxurious: Simmering wavy lasagna pasta directly in broth releases natural wheat starches that bind seamlessly with cream and Parmesan. Key Ingredients & Smart Swaps Wholesome pantry essentials, fresh produce, and quality cheeses arranged on a marble workstation. Cooked Shredded Chicken: Leftover roasted chicken breast, rotisserie chicken, or freshly poached chicken thighs shred effortlessly into the soup. Wavy Lasagna Noodles: Breaking standard dry lasagna noodles into 2-inch pieces creates charming ruffled ribbons that scoop up rich broth with every spoonful. Campanelle or mafaldine pasta can be substituted. Whole-Milk Ricotta Cheese: Whisked with herbs and dolloped atop the soup, it melts into a velvety cream cloud. Mascarpone or cream cheese make wonderful substitutes. Low-Sodium Chicken Bone Broth: Delivers savory depth, essential protein, and natural gelatin body. Vegetable broth also works well for a lighter base. Heavy Whipping Cream: Blends into the broth to produce a luscious, velvety texture that resists curdling when simmered. Fresh Baby Spinach: Wilts in seconds right before serving, adding vibrant green contrast, dietary fiber, and fresh garden balance. Aged Parmesan Cheese: Stirred directly into the broth and the ricotta topper to supply rich, salty umami depth. Step-by-Step Cooking Walkthrough 1. Sauté Aromatics & Form Roux: In a large 6-quart Dutch oven, melt butter over medium heat. Sauté diced yellow onion for 4 minutes until translucent, then add minced garlic. Sprinkle flour over the aromatics and stir for 1 minute to cook out raw flour notes. 2. Whisk Liquid & Simmer Noodles: Gradually whisk in chicken bone broth and heavy cream until silky smooth. Bring to a gentle boil, add the broken lasagna pieces, and simmer uncovered on medium-low for 10 to 12 minutes until al dente. Simmering broken lasagna ribbons directly in the pot produces a silky, starch-enriched cream broth. 3. Fold in Chicken, Spinach & Parmesan: Stir in shredded chicken, baby spinach, and grated Parmesan. Simmer gently for 2 to 3 minutes until the spinach wilts and cheese dissolves into a velvety consistency. 4. Crown with Ricotta Swirl: In a small bowl, mix ricotta, parmesan, chopped parsley, and cracked black pepper. Ladle soup into deep bowls and top each serving with a generous dollop of the ricotta swirl. 3 Chef Secrets for Perfect Results 1. Stir Noodles Frequently During the First 3 Minutes: Broken lasagna sheets have flat surfaces that can stick together. Giving them a thorough stir immediately after dropping them into the hot broth prevents clumping. 2. Keep Noodles Al Dente: Because hot soup retains heat in the pot, cook noodles until just al dente. They will continue to soften slightly as the soup rests without becoming mushy. 3. Serve the Ricotta Cold or Room Temp: Dolloping cool seasoned ricotta on top of piping-hot soup is a signature culinary technique. It slowly melts as you eat, creating dynamic swirls of creaminess with each bite. What to Serve With White Chicken Lasagna Soup Garnished with fresh basil, cracked pepper, and served alongside warm garlic sourdough bread. Toasted Garlic Sourdough: Thick artisan sourdough slices brushed with roasted garlic butter are essential for dipping into the decadent broth. Italian Chopped Salad: Crisp romaine lettuce, sliced pepperoncini, cherry tomatoes, and shaved parmesan tossed in a bright red wine vinaigrette cut through the cream. Roasted Autumn Vegetables: Balsamic-roasted baby carrots or caramelized Brussels sprouts add seasonal earthiness to the dinner spread. Iced Citrus Sparkling Spritzer: Cold bubbly water with fresh lemon and crushed mint offers a crisp, refreshing palate cleanser. Storage, Freezing & Reheating Instructions Refrigeration: Cool leftover soup and store in an airtight container for up to 4 days. Keep extra ricotta swirl in a separate container for topping fresh bowls. Gentle Reheating: Reheat in a saucepan over medium-low heat with an extra splash of chicken broth or milk, as lasagna noodles naturally absorb liquid as they rest. Freezing Guidelines: If meal prepping to freeze, prepare the soup base and chicken without adding noodles or dairy cream. Freeze the broth base for up to 3 months, then add fresh cream and boil noodles when ready to serve. Frequently Asked Questions Can I cook the lasagna noodles separately?Yes! If you prefer a thinner broth or expect lots of leftovers over several days, boil the broken noodles separately in salted water and divide them into bowls before ladling hot soup on top. Can I make this soup in a slow cooker?Yes. Add onions, garlic, broth, seasonings, and raw chicken to the slow cooker and cook on LOW for 6 hours. Shred the chicken, stir in cream, broken noodles, and cook on HIGH for 25 minutes until noodles are tender, then fold in spinach and parmesan. Can I use gluten-free lasagna noodles?Yes! Gluten-free brown rice or corn-based lasagna sheets work well. Cook them separately for optimal texture to prevent noodles from breaking down too quickly. Pin This Recipe for Later
Creamy Garlic Butter Steak and Spinach Tortellini
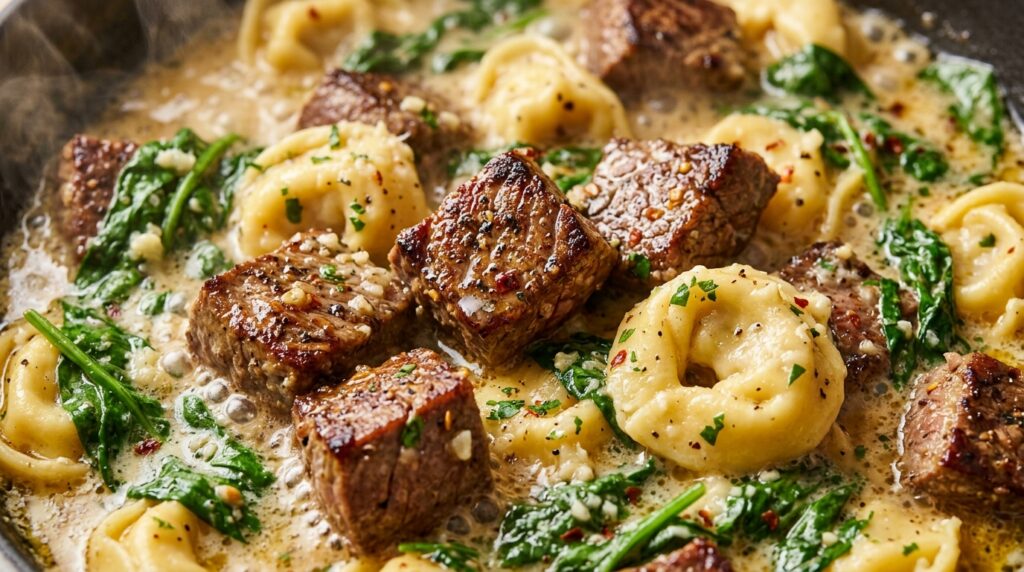
When gourmet steakhouse luxury meets effortless weeknight speed, this creamy garlic butter steak and spinach tortellini redefines comfort food in under 20 minutes. Tender, juicy halal sirloin steak cubes seared with a savory caramelized crust combine with plump cheese tortellini and tender baby spinach, bathed in an ultra-velvety garlic herb parmesan cream sauce that transforms dinner into an unforgettable feast. The secret to mastering this skillet dinner lies in the high-heat sear of the steak bites followed by deglazing the pan with nutrient-rich halal beef bone broth. By searing the meat quickly and removing it before simmering the fresh tortellini directly in the cream reduction, every pillow of pasta absorbs intense pan drippings while the steak remains melt-in-your-mouth juicy and pink at the center. Why You’ll Love This Recipe 20-Minute Weeknight Elegance: Fresh refrigerated tortellini cooks in just 3 minutes directly in the sauce, bringing steakhouse indulgence to your table with minimal effort. Tender Caramelized Steak Bites: Searing bite-sized halal sirloin in butter and olive oil locks in savory juices while creating irresistible crispy browned edges. 100% Halal Wholesome: Made with certified halal beef, pure beef bone broth reduction, zero alcohol deglazing, and zero pork products for clean, family-trusted dining. Silky One-Pan Sauce Emulsion: Real heavy cream and freshly grated Parmesan melt into the pan drippings to create a glossy, restaurant-caliber cream reduction. Key Ingredients & Smart Swaps Steakhouse-quality halal sirloin, fresh tortellini, and wholesome pantry essentials prepped on a clean workstation. Halal Top Sirloin or Ribeye: Sirloin offers the perfect balance of robust beefy flavor, tenderness, and lean texture that sears quickly without turning tough. Ribeye or tenderloin tips make ultra-luxe alternatives. Fresh Cheese Tortellini: Refrigerated three-cheese tortellini (filled with ricotta, parmesan, and romano) cook directly in the skillet in under 4 minutes. Frozen tortellini can be boiled 2 minutes prior to adding. Unsalted Butter & Olive Oil: Combining butter with olive oil raises the smoke point, allowing you to achieve a deeply caramelized steak crust without burning. Low-Sodium Beef Bone Broth: Halal bone broth provides deep roasted collagen body and savory depth for deglazing the pan. Heavy Whipping Cream: Creates a luxurious velvet foundation that coats the tortellini ridges without breaking under heat. Fresh Baby Spinach: Adds vibrant garden color, essential iron, and fresh balance to rich steak and cream. Aged Parmesan Cheese: Always grate fresh from a wedge of Parmigiano-Reggiano for smooth melting umami. Step-by-Step Cooking Walkthrough 1. Season and High-Heat Sear: Pat cubed steak dry with paper towels. Toss with garlic powder, smoked paprika, salt, and black pepper. Heat olive oil and butter in a 12-inch heavy skillet over high heat. Sear steak cubes for 2 minutes undisturbed, stir, cook 1 more minute, then transfer to a plate to rest. 2. Build the Garlic Cream Base: Turn heat to medium. Melt remaining butter and sauté minced garlic and rosemary for 60 seconds until aromatic. Pour in beef bone broth and heavy cream, scraping up the browned steak bits from the pan bottom. Simmering fresh tortellini directly in rich cream sauce allows pasta to absorb deep savory flavor. 3. Simmer Tortellini to Pillowy Perfection: Add fresh cheese tortellini directly into the liquid. Cover and simmer for 3 to 4 minutes until tender and plump. 4. Fold in Spinach, Steak and Cheese: Remove the lid, turn heat to low, and stir in baby spinach and grated Parmesan until the cheese melts into a satiny glaze. Return the steak bites and resting juices to the pan, toss for 60 seconds, and serve warm. 3 Chef Secrets for Perfect Results 1. Thoroughly Dry the Steak Before Searing: Moisture is the enemy of a golden steakhouse crust. Patting the meat dry ensures instant Maillard browning rather than steaming. 2. Never Simmer Steak in the Sauce: Overcooked steak becomes tough and chewy. Always sear quickly, remove, let the tortellini cook in the sauce, and fold the steak back in at the very end just to warm through. 3. Use Fresh Refrigerated Tortellini: Fresh pasta absorbs pan sauce much better than dried pasta and cooks in a fraction of the time, keeping the entire preparation under 20 minutes. What to Serve With Steak and Tortellini Garnished with chopped parsley and cracked pepper alongside crisp toasted garlic bread. Toasted Garlic Sourdough: Thick, crispy slices of garlic herb sourdough bread are perfect for capturing every trace of velvety garlic parmesan cream. Crisp Caesar Salad: Chopped romaine hearts tossed with shaved parmesan and homemade lemon dressing add cool, crisp acidity. Roasted Asparagus Spears: Tender roasted asparagus with a squeeze of fresh lemon cuts smoothly through the richness of the steak and cheese. Iced Sparkling Berry Spritzer: Chilled sparkling water infused with fresh berries and mint leaves makes an elegant, refreshing accompaniment. Storage, Freezing & Reheating Instructions Refrigeration: Store leftover steak and tortellini in an airtight glass container in the refrigerator for up to 3 days. Gentle Reheating: Reheat in a skillet over low heat with 2 tablespoons of beef broth or milk, stirring gently until the sauce returns to a glossy cream consistency. Avoid high microwave heat to prevent overcooking the tender steak. Freezing Guidelines: Freezing is not recommended as dairy cream sauces and tender tortellini tend to alter in texture upon thawing. This skillet dish is best savored fresh. Frequently Asked Questions What cut of beef works best for this recipe?Top sirloin, ribeye, or beef tenderloin tips are ideal because they remain remarkably tender during a quick high-heat sear. Avoid stew meat or chuck roast, which require long braising times. Can I use frozen tortellini instead of refrigerated?Yes! If using frozen tortellini, simply boil them in salted water for 2 minutes first to thaw, drain, and then stir directly into the skillet sauce for the final 2 minutes. Can I substitute mushrooms for the spinach?Sliced cremini or baby bella mushrooms make an incredible addition. Sauté the mushrooms in butter with the garlic before pouring in the cream and broth. Pin This Recipe for Later Love restaurant-quality weeknight comfort? Save this pin to your Pinterest
Sheet Pan Maple Mustard Chicken and Sweet Potatoes
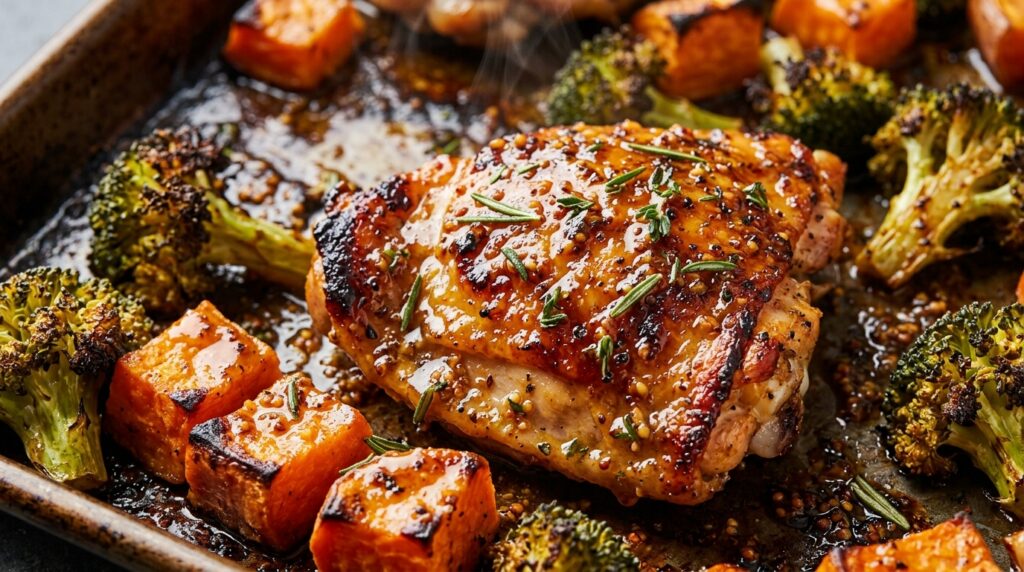
When effortless cleanup meets incredible depth of flavor, this sheet pan maple mustard chicken and sweet potatoes shines as the ultimate weeknight family dinner. Tender, juicy roasted halal chicken thighs caramelize in a glossy, savory-sweet Dijon glaze alongside crisp-tender broccoli florets and golden sweet potato cubes, roasting to perfection on a single baking tray in just 35 minutes. Roasting high-heat vegetables alongside seasoned chicken creates an irresistible harmony of textures. The natural sugars in pure amber maple syrup combine with whole grain mustard and pungent garlic, transforming into a lacquered glaze that locks in meat juices while blistering vegetable edges. With zero pans to scrub and maximum nutrition packed into every serving, this dinner is a reliable favorite for healthy, cozy eating. Why You’ll Love This Recipe Effortless 35-Minute Sheet Pan Prep: One baking pan lined with parchment means preparation takes just 15 minutes, with virtually zero post-dinner dishwashing. Irresistible Sweet & Savory Glaze: Pure maple syrup balances the tangy punch of Dijon and stone-ground mustard, elevated by fragrant fresh rosemary. Nutrient-Dense & 100% Halal Wholesome: Loaded with beta-carotene, lean protein, antioxidant-rich broccoli, and wholesome halal ingredients with zero alcohol or pork derivatives. Meal Prep Friendly: Holds its texture and caramelized flavor remarkably well for 4 days of refrigerated weekday lunches. Key Ingredients & Smart Swaps Wholesome produce, pantry staples, and lean protein prepped for seamless one-pan sheet roasting. Boneless Skinless Chicken Thighs: Naturally juicier and far more forgiving under high oven heat than chicken breasts, developing succulent tender bites. Boneless breasts can be used if roasting time is monitored closely. Pure Amber Maple Syrup: Grade A amber maple syrup provides rich woodsy sweetness and caramelizes beautifully. Honey or pure date syrup make fine substitutes. Dijon & Whole Grain Mustard: Combining smooth Dijon with seeded stone-ground mustard delivers both bright acid tang and rustic culinary texture. Sweet Potatoes: Diced into 3/4-inch cubes so they roast to fork-tender perfection in sync with the chicken. Butternut squash or baby Yukon gold potatoes also work wonderfully. Fresh Broccoli Florets: Added to the pan alongside the chicken so the edges char and crisp without turning mushy. Brussels sprouts or asparagus spears are great alternatives. Apple Cider Vinegar: Cuts through the richness of the maple glaze with a crisp, refreshing acidity. Fresh lemon juice is an equally bright substitute. Fresh Rosemary & Garlic: Earthy aromatic herbs that ground the sweetness of the glaze with savory depth. Step-by-Step Cooking Walkthrough 1. Preheat and Start the Sweet Potatoes: Preheat your oven to 400°F (200°C) and line a heavy-duty sheet pan with parchment. Toss cubed sweet potatoes with olive oil and a pinch of salt, roasting for 10 minutes first so they become completely tender inside. 2. Whisk the Maple Dijon Glaze: In a medium mixing bowl, whisk together maple syrup, Dijon mustard, whole grain mustard, olive oil, minced garlic, apple cider vinegar, chopped rosemary, smoked paprika, salt, and pepper until thick and glossy. Brushing the chicken with savory-sweet maple glaze ensures deeply caramelized, lacquered edges. 3. Arrange and Roast: Slide the pre-roasted sweet potatoes to the side of the pan. Nestle the glazed chicken thighs and fresh broccoli florets across the tray. Roast for 20 minutes, basting with remaining glaze halfway through. 4. Quick Broil and Rest: Turn the broiler on high for 2 to 3 minutes until the glaze bubbles vigorously with charred golden edges. Allow the chicken to rest for 5 minutes before serving so meat juices redistribute throughout. 3 Chef Secrets for Perfect Results 1. Give Sweet Potatoes a 10-Minute Head Start: Dense root vegetables require more cooking time than tender chicken thighs. Pre-roasting the sweet potatoes for 10 minutes ensures meltingly soft centers without overcooking the chicken. 2. Avoid Crowding the Pan: Spread ingredients into a single layer with breathing room between pieces. If food is stacked, moisture will steam rather than roast, preventing that coveted crispy caramelized exterior. 3. Finish Under the Broiler: The high heat of the top broiler caramelizes the sugars in the maple glaze within minutes, creating professional restaurant-style blistered edges without drying out the meat. What to Serve With Maple Mustard Chicken Garnished with fresh rosemary and cracked pepper alongside a sparkling citrus refreshment. Warm Artisan Dinner Rolls: Freshly baked crusty rolls or fluffy biscuits are wonderful for soaking up savory pan drippings. Fluffy Quinoa or Brown Rice: For active days, serve over a bed of steamed nutty quinoa or wild rice to catch every drop of the Dijon glaze. Crisp Mixed Greens: A simple baby arugula salad tossed with shaved fennel and a lemon-shallot dressing balances the sweet roast profile. Iced Sparkling Herb Lemonade: Chilled sparkling water with fresh lemon and a sprig of fresh mint makes a crisp, refreshing palate cleanser. Storage, Freezing & Reheating Instructions Refrigeration: Store cooled chicken and roasted vegetables in airtight meal prep containers for up to 4 days. Oven or Skillet Reheating: Reheat in an oven or toaster oven at 350°F (175°C) for 10 minutes, or in a covered skillet over medium-low heat with a tablespoon of water, restoring the crisp roasted edges. Freezing Guidelines: Freeze cooked chicken and sweet potatoes in a freezer-safe container for up to 2 months. Note that roasted broccoli is best enjoyed fresh, as freezing can soften its crisp texture. Frequently Asked Questions Can I use chicken breasts instead of thighs?Yes! Use large boneless skinless chicken breasts cut into 2-inch cutlets. Check internal temperature at the 15-minute mark so they remain juicy and tender. Can I prepare this sheet pan meal ahead of time?Absolutely. Chop sweet potatoes and broccoli up to 2 days in advance, and whisk the glaze in a mason jar. When ready for dinner, toss and roast in under 40 minutes. Is this recipe gluten-free and dairy-free?Yes, this recipe is naturally 100% gluten-free and dairy-free! Always verify your Dijon mustard label to ensure no hidden gluten additives. Pin This Recipe for Later Love quick, healthy sheet pan weeknight dinners? Save this pin to your Pinterest dinner board so you always have this
One-Pot Creamy Cajun Chicken and Bowtie Pasta
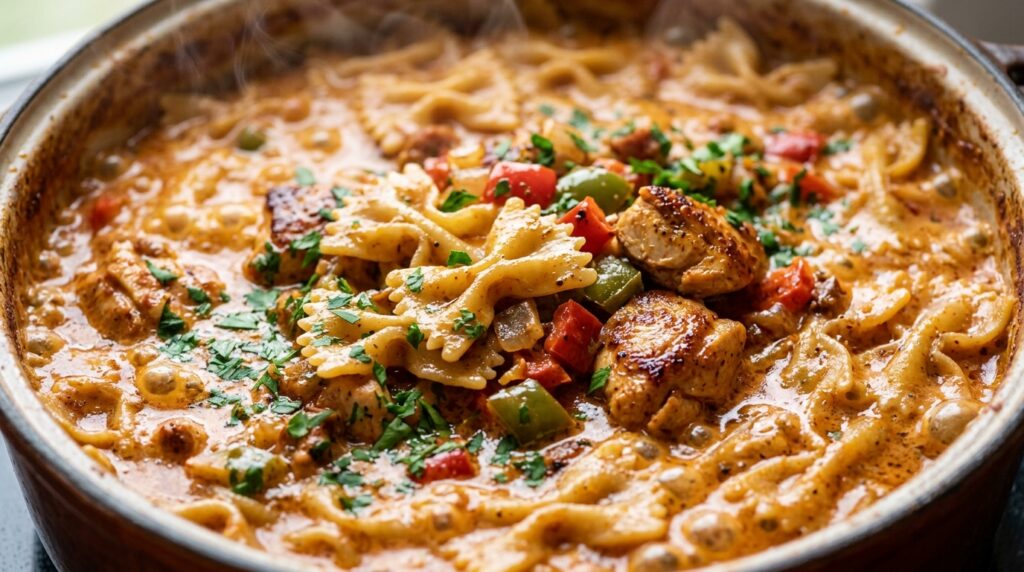
When a busy weeknight calls for uncompromising comfort with a bold, smoky kick, this one-pot creamy cajun chicken pasta delivers restaurant-quality satisfaction straight to your dinner table in just 25 minutes. Golden-seared chicken breast bites, crisp-tender sweet bell peppers, and tender bowtie farfalle noodles bathe in an ultra-velvety cajun-parmesan cream sauce that clings to every ruffle, creating pure cozy perfection with minimal pots to clean. Cooking raw pasta directly in a blend of rich chicken bone broth and heavy cream is the ultimate chef secret to foolproof pasta dinners. As the farfalle simmers, natural starches release right into the liquid, binding seamlessly with freshly grated Parmesan to produce an emulsion that never separates or turns greasy. With vibrant bell peppers adding sweet balance against bold Louisiana spices, every single forkful hits all the right flavor notes. Why You’ll Love This Recipe One-Skillet Ease: Everything—from searing the spiced chicken to simmering the raw noodles—cooks in a single 12-inch skillet for effortless 10-minute cleanup. Ultra-Silky Starch Emulsion: Cooking dry bowtie pasta in broth concentrates natural wheat starches into the sauce, creating a glossy, velvety consistency without messy flour roux. 100% Halal Wholesome: Made with pure halal chicken breast, nutrient-dense chicken bone broth, and zero pork or alcohol deglazing for clean, family-friendly nourishment. Bold Smoky & Savory Harmony: Sweet bell peppers and aromatic garlic temper the rustic cajun spice blend, rounded out by rich melted aged Parmesan. Key Ingredients & Smart Swaps Wholesome pantry staples and fresh produce prepared for seamless one-pot skillet cooking. Boneless Skinless Chicken Breasts: Diced into uniform 1-inch cubes so they sear quickly with caramelized edges while remaining remarkably juicy inside. Boneless chicken thighs work equally well. Bowtie Farfalle Pasta: The delicate ruffles and pinched centers capture the thick cajun sauce beautifully. Penne, rigatoni, or cavatappi make excellent direct swaps. Cajun Seasoning: Use a high-quality salt-free or low-sodium blend containing paprika, garlic powder, onion powder, thyme, and black pepper. This allows you to dial in seasoning intensity without over-salting. Bell Peppers: Sliced sweet red and yellow bell peppers provide crisp freshness, vibrant color, and natural sweetness that balances the savory cajun heat. Low-Sodium Chicken Bone Broth: Delivers deep collagen richness and savory body while the pasta cooks. Beef bone broth or wholesome vegetable broth work well too. Heavy Whipping Cream: Creates a silky, luxurious texture that resists curdling over heat. For a lighter touch, use whole milk blended with cream cheese. Freshly Grated Parmesan Cheese: Always grate fresh from a block of Parmigiano-Reggiano for maximum meltability and salty umami depth. Step-by-Step Cooking Walkthrough 1. Season and Sear the Chicken: Toss diced chicken with Cajun seasoning, smoked paprika, garlic powder, and kosher salt. Sear in olive oil and melted butter in a deep 12-inch skillet over medium-high heat for 3 to 4 minutes undisturbed until golden brown. Flip, cook for 2 minutes, then transfer to a plate to prevent overcooking. 2. Sauté the Sweet Peppers and Aromatics: In the same skillet, drop in diced red and yellow bell peppers with minced garlic. Sauté for 2 minutes, using a wooden spatula to scrape up all the savory browned bits left behind by the chicken. Simmering bowtie farfalle directly in broth and cream builds an ultra-creamy, clingy pan sauce. 3. Simmer the Pasta Directly in Sauce: Pour in the chicken bone broth and heavy whipping cream, bringing to a gentle simmer. Add the uncooked bowtie pasta, stirring to submerge the noodles. Cover tightly, turn heat to medium-low, and simmer gently for 12 to 14 minutes until tender. 4. Fold in Cheese and Rest: Remove the lid, reduce heat to low, and stir in freshly grated Parmesan until melted and glossy. Return the seared chicken and any accumulated resting juices to the pan, tossing gently for 1 minute before finishing with fresh parsley. 3 Chef Secrets for Perfect Results 1. Sear in Batches to Avoid Steaming: For deeply flavorful caramelized crusts on your chicken bites, make sure your skillet is sizzling hot before the meat hits the pan. If your pan is crowded, sear in two smaller batches so the chicken sears rather than steams. 2. Stir Halfway Through the Pasta Simmer: Because bowtie pasta noodles have dense pinched centers, giving them a gentle stir halfway through cooking prevents them from sticking to the skillet bottom and ensures even heat distribution throughout. 3. Use Fresh Block Parmesan Off the Heat: Pre-shredded bagged cheese contains anti-caking cellulose agents that prevent a smooth melt. Grating fresh Parmesan and folding it in over gentle low heat guarantees a satiny, velvety sauce without graininess. What to Serve With One-Pot Cajun Chicken Pasta Garnished with chopped parsley and served alongside warm artisan garlic bread and crisp greens. Crusty Garlic Bread: Warm toasted sourdough or French baguette brushed with roasted garlic butter is ideal for wiping up every drop of velvety cajun cream. Crisp Garden Salad: A vibrant mix of romaine lettuce, baby cucumbers, cherry tomatoes, and a bright lemon vinaigrette offers a refreshing palate cleanser between rich bites. Charred Green Vegetables: Roasted asparagus spears or garlic-sautéed broccolini add garden-fresh crunch and vivid color to the presentation. Chilled Sparkling Citrus Spritzer: Iced sparkling water infused with fresh lemon slices and mint leaves cuts smoothly through the rich, savory sauce. Storage, Freezing & Reheating Instructions Refrigeration: Allow leftover pasta to cool to room temperature, then transfer to an airtight glass container. Refrigerate safely for up to 4 days. Gentle Reheating: Warm leftovers in a skillet over low heat with a splash of milk or chicken broth to restore the cream sauce’s original silky consistency. Avoid high microwave heat, which can cause the cheese emulsion to separate. Freezing Guidelines: Because cream-based sauces and tender cooked pasta can become grainy when thawed, freezing is not recommended. This recipe is best enjoyed fresh or from the refrigerator within 4 days. Frequently Asked Questions Can I make this pasta less spicy for kids?Yes! Simply reduce the Cajun seasoning to 1/2 tablespoon and substitute mild sweet paprika for the remaining spice. The sauce will
Creamy Tuscan Garlic Butter Shrimp and Rice Skillet
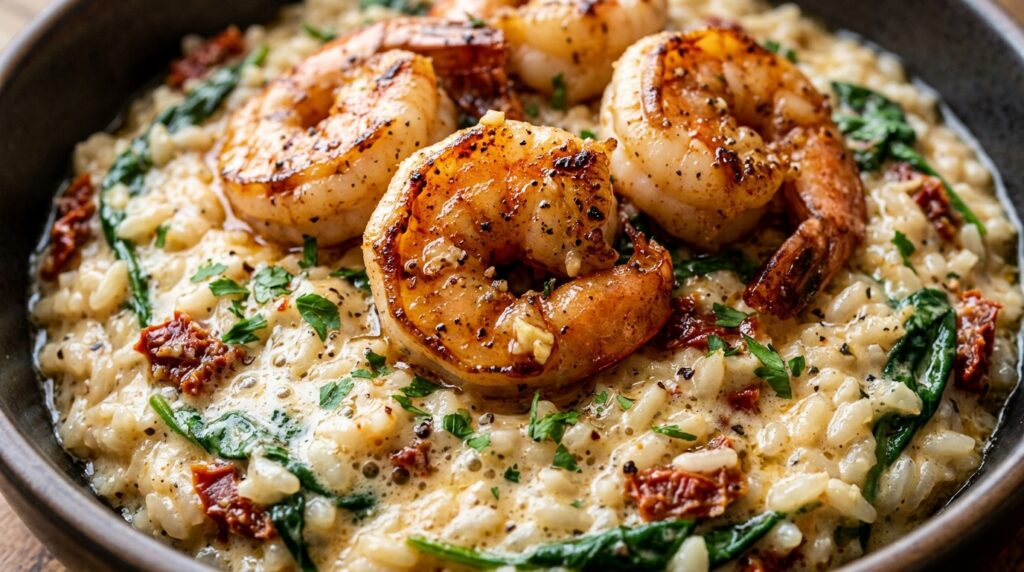
Few culinary combinations rival the sheer elegance and effortless comfort of tender, garlic-kissed seafood nestled into a pan of velvety rice. This Creamy Tuscan Garlic Butter Shrimp and Rice Skillet delivers juicy, plump jumbo shrimp basted in savory garlic butter, resting atop a luscious bed of jasmine rice simmered in sun-dried tomato and parmesan cream. From the moment the garlic hits the hot skillet to your very first bite, this 25-minute restaurant-standard meal will transform your regular weeknight routine into a gourmet Mediterranean dining experience. The culinary brilliance of this skillet lies in harnessing the natural pan fond from searing the shrimp. After quickly browning the shrimp in fragrant olive oil and butter, the fragrant drippings remain in the skillet to toast raw jasmine rice alongside sweet sun-dried tomatoes and minced garlic. Simmering the rice directly in rich chicken bone broth infuses every individual grain with savory depth, while a gentle finish of heavy cream, nutty Parmigiano-Reggiano, and tender baby spinach creates a risotto-like richness without hours of endless stirring. Why You’ll Love This Recipe 25-Minute Dinner Miracle: Fast-cooking shrimp and quick-simmered jasmine rice come together in under half an hour for stress-free weeknight dining. True One-Skillet Convenience: Both the seafood, aromatics, grains, and cream sauce cook entirely in a single cast iron skillet, keeping post-dinner cleanup down to minutes. 100% Halal Wholesome: Made with pure low-sodium chicken bone broth and freshly squeezed lemon juice for deglazing, strictly avoiding any wine, cooking alcohols, or pork products. Velvety Restaurant Texture: Rich heavy cream and finely grated parmesan create an indulgent, silky sauce that clings delightfully to each grain of rice and succulent shrimp. Key Ingredients & Smart Swaps Fresh, wholesome ingredients arranged on a clean kitchen workstation. Jumbo Raw Shrimp: Choose peeled and deveined shrimp (size 16/20 or 21/25) for the juiciest bite. Thaw frozen shrimp completely and pat dry with paper towels to ensure a golden sear rather than steaming. White Jasmine Rice: Fragrant long-grain jasmine rice cooks tenderly and absorbs savory liquids beautifully. Rinsing thoroughly removes surface starches so the grains cook evenly without clumping. Oil-Packed Sun-Dried Tomatoes: Impart deep, savory sweetness and vibrant color. Using a drizzle of the seasoned tomato oil to cook the garlic elevates the entire flavor profile. Fresh Garlic & Unsalted Butter: The aromatic foundation of classic Tuscan cooking, giving the dish its irresistible bistro fragrance. Low-Sodium Chicken Bone Broth: Provides savory depth and rich collagen body to the rice base while keeping total sodium levels well balanced. Heavy Whipping Cream & Parmesan: Create the velvety emulsion that binds the skillet together. Always use freshly grated cheese off the block for the smoothest melt. Fresh Baby Spinach: Folds into the hot skillet at the very end, wilting instantly and contributing vital iron, fiber, and bright garden freshness. Step-by-Step Cooking Walkthrough 1. Sear the Seasoned Shrimp: Pat shrimp completely dry. Toss with garlic powder, smoked paprika, kosher salt, and black pepper. Heat 1 tablespoon butter and 1 tablespoon olive oil in a 12-inch heavy skillet over medium-high heat. Sear shrimp for 90 seconds to 2 minutes per side until pink, lightly caramelized, and curled into loose C-shapes. Remove immediately to a clean plate. 2. Toast Aromatics & Rice: Reduce skillet heat to medium. Melt the remaining tablespoon of butter, adding minced garlic and sliced sun-dried tomatoes. Sauté for 60 seconds until fragrant. Add rinsed jasmine rice and stir for 1 to 2 minutes to toast the grains in the savory fond. TECHNIQUE CUE: Searing the shrimp first and setting them aside prevents overcooking, while their savory pan fond infuses the rice with deep, restaurant-quality flavor. 3. Simmer Rice to Tender Perfection: Pour in low-sodium chicken bone broth and lemon juice, scraping up all browned bits from the pan floor. Bring to a rapid bubble, cover tightly with a lid, and turn heat to low. Simmer undisturbed for 12 minutes until all liquid is absorbed and rice is fluffy. 4. Fold in Cream, Cheese & Shrimp: Uncover the skillet and keep heat on low. Pour in heavy cream, freshly grated parmesan, and fresh baby spinach. Stir gently for 2 minutes until the cheese is melted and the greens are tender. Nestle the cooked shrimp and resting juices on top, garnish with fresh parsley, and serve immediately. 3 Chef Secrets for Perfect Results 1. Never Overcook Your Shrimp: Shrimp cook in a flash! As soon as they turn opaque pink and form a loose “C” shape, pull them off the heat. If they curl into tight “O” shapes, they have overcooked and will become rubbery. 2. Rinse Your Jasmine Rice: Place raw rice in a fine-mesh sieve and rinse under cold tap water until the runoff is clear. Removing surface starch guarantees tender, distinct grains rather than a gummy texture. 3. Warm the Cream Before Adding: Adding ice-cold cream to a hot skillet can cause the sauce to seize or separate. Let your heavy cream sit on the counter for 10 minutes before cooking, or warm it gently so it incorporates seamlessly into the hot rice. What to Serve With Tuscan Garlic Shrimp and Rice Served restaurant-style with freshly squeezed lemon and artisan garlic bread. Warm Crusty Garlic Bread: A warm slice of garlic herb ciabatta or toasted sourdough is indispensable for capturing the rich garlic parmesan cream sauce. Crisp Caesar Salad: A bowl of crisp chopped romaine hearts tossed with shaved parmesan, crunchy croutons, and creamy lemon dressing provides an invigorating crisp contrast. Steamed or Roasted Vegetables: Tender roasted asparagus spears, charred broccolini, or sautéed zucchini ribbons enhance the meal with vibrant Mediterranean color. Chilled Mocktails: Serve with an ice-cold sparkling water infused with fresh cucumber ribbons and lime slices, or a chilled unsweetened peach iced tea. Storage, Freezing & Reheating Instructions Refrigeration: Allow leftover shrimp and rice to cool to room temperature. Transfer to an airtight glass container and refrigerate for up to 2 days to maintain seafood freshness. Gentle Reheating: Rice naturally firms up when chilled. Reheat gently in a skillet over low
Creamy Marry Me Chicken and Orzo: 30-Minute Dinner
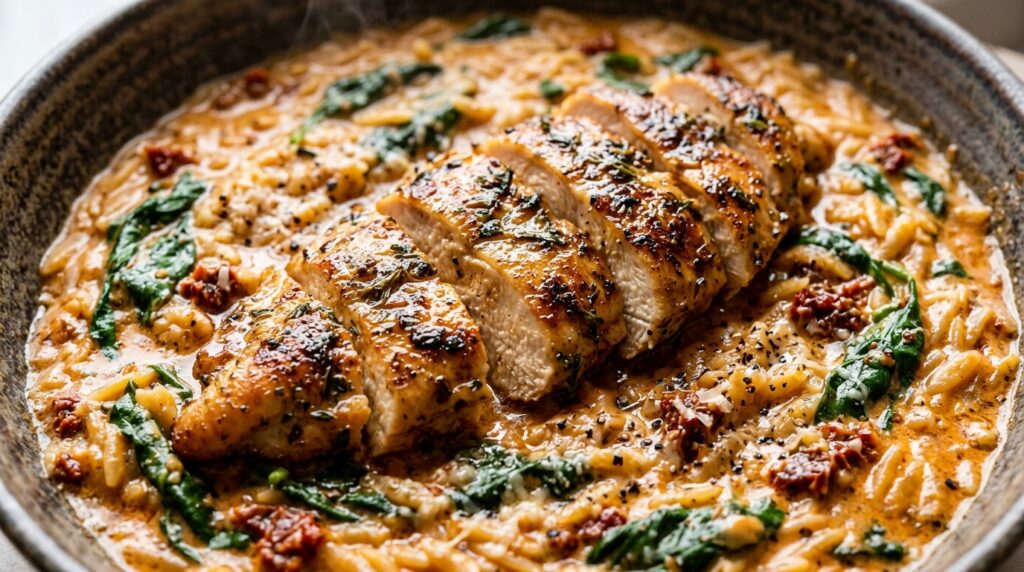
There is a reason this iconic dish earned its famous name: the intoxicating aroma of sizzling garlic, caramelized sun-dried tomatoes, and rich parmesan cream simmering in a single skillet is enough to make anyone fall head over heels at first bite. This Creamy Marry Me Chicken and Orzo brings together golden, pan-seared chicken cutlets and tender orzo pasta bathed in a luscious, velvety sauce, delivering restaurant-quality comfort to your weeknight table in just 30 minutes. The culinary magic of this one-skillet recipe lies in building deep flavor layers right in the pan. After searing seasoned chicken cutlets to golden perfection, the flavorful pan drippings (the fond) are deglazed with garlic, tangy sun-dried tomatoes, and wholesome chicken bone broth. As the orzo pasta simmers directly in this aromatic broth, it absorbs all the savory pan juices while releasing just enough natural starch to create a silky, risotto-like body without requiring complicated kitchen techniques. Why You’ll Love This Recipe Lightning Fast Speed: Ready from cutting board to dinner table in exactly 30 minutes, making it ideal for busy weeknights or impromptu dinner dates. One-Skillet Cleanup: Both the protein, pasta, and cream sauce cook entirely in a single 12-inch skillet, leaving you with virtually zero post-dinner dishes. 100% Halal Wholesome: Crafted with pure low-sodium chicken bone broth and a touch of fresh lemon juice for deglazing, keeping the recipe completely alcohol-free and pork-free. Luxurious Flavor Balance: Sweet, concentrated sun-dried tomatoes cut right through rich heavy cream and nutty Parmigiano-Reggiano for an unforgettable bite. Key Ingredients & Smart Swaps Fresh, wholesome ingredients arranged on a clean kitchen workstation. Chicken Breasts (Cutlets): Slicing large chicken breasts horizontally into thinner cutlets ensures rapid, even cooking and a juicy, tender texture that won’t dry out. Boneless skinless chicken thighs work equally well. Dry Orzo Pasta: This rice-shaped pasta cooks quickly and acts like a sponge for the creamy broth. You can substitute with ditalini pasta or arborio rice if preferred. Oil-Packed Sun-Dried Tomatoes: Offer a concentrated punch of umami, sweetness, and gentle acidity. Be sure to drain excess oil, but save a spoonful to sauté your garlic for bonus flavor! Chicken Bone Broth: Provides a rich, savory backbone for simmering the pasta. Using low-sodium broth lets you control the final salt level precisely. Heavy Whipping Cream: Creates the signature velvety sauce that clings to every grain of orzo. For a lighter touch, half-and-half or full-fat canned coconut milk can be swapped. Freshly Grated Parmesan: Always grate fresh from the block (Parmigiano-Reggiano) for a silky melt that won’t clump or turn grainy. Fresh Baby Spinach & Basil: Folded in at the very end to add bright garden color, essential nutrients, and refreshing herbal aromatics. Step-by-Step Cooking Walkthrough 1. Season and Sear the Chicken: Pat chicken cutlets thoroughly dry with paper towels. Season both sides with garlic powder, Italian seasoning, smoked paprika, salt, and pepper. Heat olive oil and butter in a heavy skillet over medium-high heat. Sear cutlets for 4 to 5 minutes per side until deeply golden with a crisp crust. Transfer to a warm plate and rest. 2. Toast the Aromatics & Orzo: Lower heat to medium. Add minced garlic and sliced sun-dried tomatoes directly into the skillet, stirring for 60 seconds until fragrant. Pour in dry orzo and toast for 1 minute, allowing the grains to absorb the caramelized chicken drippings. TECHNIQUE CUE: Stirring frequently releases the starch from the orzo, creating a naturally velvety risotto-like consistency without heavy thickeners. 3. Simmer in Savory Broth: Pour in chicken bone broth and fresh lemon juice, using your wooden spoon to deglaze and release every bit of golden fond from the bottom of the pan. Bring to a gentle bubble, then simmer uncovered for 8 to 10 minutes, stirring regularly, until the orzo is al dente. 4. Finish with Cream, Cheese & Greens: Reduce heat to low. Stir in heavy cream, freshly grated parmesan, and tender baby spinach. Stir gently for 2 minutes until the greens are wilted and the sauce turns thick and glossy. Slice the chicken, nest it back into the skillet with any juices, and garnish with fresh basil. 3 Chef Secrets for Perfect Results 1. Slice Chicken into Thin Cutlets: Thick chicken breasts take too long to cook through and often result in dry exterior edges. Halving them horizontally into thin cutlets cuts cook time in half and guarantees juicy, succulent bites every time. 2. Don’t Walk Away from Simmering Orzo: Because orzo contains natural starch and absorbs liquid rapidly, give it a stir every minute or two during simmering. This prevents the pasta from catching on the bottom while encouraging a luxurious, creamy emulsion. 3. Melt Cheese off Active High Heat: Extreme heat causes dairy proteins to seize and separate into an oily sheen. Turn the burner down to low (or remove from heat entirely) before folding in your grated parmesan and heavy cream for a mirror-smooth sauce. What to Serve With Marry Me Chicken and Orzo Served restaurant-style with freshly shaved parmesan and artisan pairings. Warm Artisan Breads: A crusty sourdough baguette, warm garlic ciabatta, or soft rosemary focaccia is essential for mopping up every last drop of sun-dried tomato cream sauce. Crisp Garden Salad: Balance the rich, velvety pasta with a bright arugula salad tossed with shaved fennel, cherry tomatoes, and a light lemon Dijon vinaigrette. Roasted Green Vegetables: Tender roasted asparagus spears, grilled broccolini, or garlic-parmesan green beans make colorful, nutrient-dense companions. Refreshing Beverages: Pair with sparkling mineral water infused with fresh lemon and crushed mint, or chilled non-alcoholic white grape spritzer. Storage, Freezing & Reheating Instructions Refrigeration: Allow leftover chicken and orzo to cool completely to room temperature. Store in an airtight glass container in the refrigerator for up to 3 to 4 days. Gentle Reheating: Orzo naturally continues to absorb moisture as it chills. Reheat portions in a skillet over medium-low heat, adding 2 to 3 tablespoons of chicken broth or a splash of cream, stirring gently until hot and creamy. Microwave on 70% power in